So, you’re sick of staring at that blank tile above the stove or the blue snail wallpaper your mother just loved and couldn’t live without. Or, maybe, you’ve just bought a brand new home and you have no idea where to start with decorating your new, beautiful kitchen. It’s a problem many can relate to, but a problem few know how to fix within their budget. Making your walls pleasing to look at shouldn’t have to be an expensive, bank-breaking endeavor; you should be able to have your dream kitchen on a budget. And you know what? You definitely can and we’re about to tell you how.
Want some quick and easy fixes?
- Stick-on wallpaper. Give your kitchen wall a whole new look with just a few no-hassle steps.
- Wall-stickers. Want a blooming flower or a glow-in-the-dark night sky on your walls? Wall stickers are your new best friend. There’s a sticker for everyone and, better yet, they’re cost-effective and easy to use.
- Photographs. Take your old photos out of the closet and show them off!
- Paint Samples. Repurpose! Find some paint samples and make collages or hang up some origami made out of newspaper and gum wrappers.
- Handmade art. Make some origami with the family and hang it up!
Need more ideas? Don’t worry, we’ve got you covered. Continue reading and we’ll guide you through the first steps of making your dream kitchen.
DIY Decorating Ideas
So you’re standing in your kitchen and, to be frank, you’re just not impressed. Your walls are bare and bland and you have no idea where to start in fixing that without spending hundreds if not thousands of dollars. No need to worry, though, because we’ve got the easiest do-it-yourself renovation tips that will help you spruce up your walls in a jiffy.
Stick-on Wallpaper
The first item of discussion today is stick-on wallpaper. If you’ve ever tried to plaster wallpaper onto a wall without the help of a professional, you know just how life-saving the invention of stick-on wallpaper truly is. Simply go on Amazon and pick out one of the many options they have available. Once it arrives at your home, the next steps are as easy as A-B-C.
- Clean your wall. Make sure to be rid of all dust and other nasty little things that might create creases or lumps in your wallpaper.
- Measure your wall to plan out your strip placement and use a pencil and a ruler to draw out perfectly straight lines to ensure ease in the next steps.
- Cut your wallpaper. If you have a specific pattern your wallpaper needs to go into, be sure to number the back of them to keep track of which strip goes where.
- Peel 10-12 inches of backing off at a time as you press your wallpaper onto your wall. Work from the top and use a plastic scraper to press the wallpaper flat and ensure smoothness.
- Repeat until you have your desired effect.
Now, applying is the easy part. The hard part? Picking out which wallpaper you want. Well, here are a few we’ve handpicked and think will look great in your kitchen.
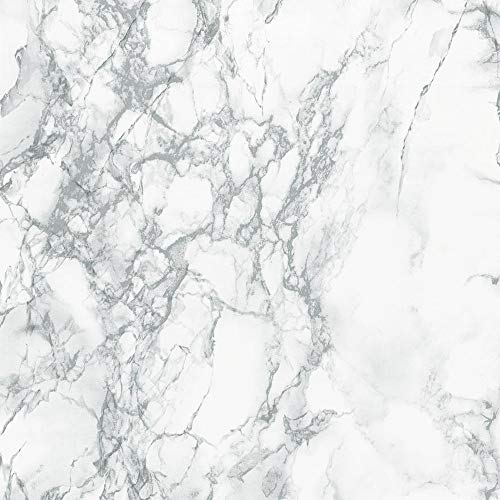
This chic marbled wallpaper that is sure to give you the smooth, elegant finish you want without all the extra weight and difficulty. Click here to see this on Amazon.
This beautiful green rainforest wallpaper is sure to keep you in touch with mother nature when you can’t spare the time to hassle with live plants. Click here to see this on Amazon.

This lovely 3D brick-patterned wallpaper is perfect for those who love the rustic look of brick and stone but hate the maintenance. Click here to see this on Amazon.

Wall Stickers
It doesn’t have to just be wallpaper, either. If you want a little extra decoration but don’t want the hassle of putting an entirely new spread on your wall, some of these wall stickers might suit your fancy a bit better.
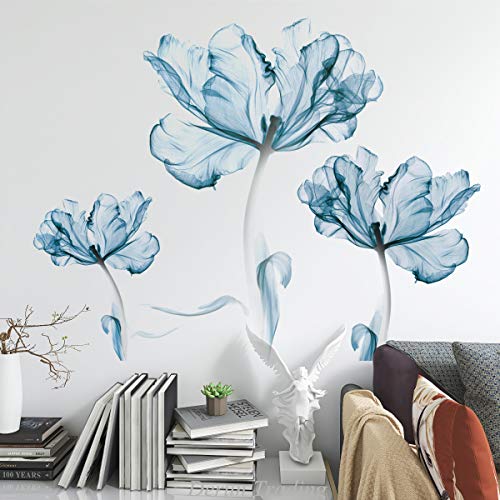
These eye-catching, yet subtle flowers that will bloom across your walls. Click here to see this on Amazon.
This beautiful birdcage decal that will breathe a bit of life into your decor. Click here to see this on Amazon.

These polka-dots, made for your simple but fun-loving style. Click here to see this on Amazon.

What Do You Do With All That Empty Space?
You’ve put up some stick-on wallpaper and you’re loving it, I know, but the wide blankness of your walls is still getting to you. You’ve made an improvement, but you and I both know there’s always room for more.
Photographs
Have any photos lying around? Or maybe a nice summer collection you’ve been waiting on getting developed? Well, with a bit of twine and some clothespins, your photos can be the centerpiece of your kitchen without the bulky and expensive frames. Spread and secure a piece of twine, or other strings you have lying about, so it arches up across the wall. Then, use clothespins to hang up your photos on it.
No photos? Use it to post inspiration, recipes, or reminders. Do take care in not hanging anything over the stove or any other heated objects or appliances with an open flame as this will be an extreme fire hazard.
Mirrors
Mirrors are also great space-fillers. Not only do they look great, but they make the room seem brighter and more open with minimal effort. But, you have to admit, sometimes square and circle mirrors can get boring.
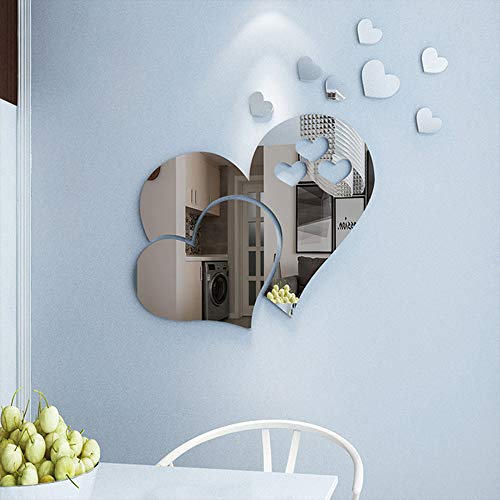
Spice up your mirror game with these heart-shaped, stick-on wall mirrors. Click here to see this on Amazon.
But hearts aren’t for everyone, so this funky Mayfun mirror may be a better alternative. Click here to see this on Amazon. Either way, they’re sure to be a talking point.

Do keep in mind, however, the maintenance required with having a mirror in a splash-risk area like the kitchen. Any mirrors put up in the kitchen will need to be cleaned semi-regularly to keep up appearances.
Decorate Your Kitchen for Convenience
Still need something to fill the void? What about your own kitchen utensils? That beautiful soup spoon you got at a thrift store two years is still sitting in your drawer, never used and never seen. Well, with a few hooks (Stick-on or drilled, it doesn’t matter) you could display your antique soup spoons however you please. See? They aren’t entirely useless, it was money well spent!
Or, if you’d rather just have easier access to your kitchen utensils while filling up that space, this is a great two-in-one solution.
Also, keep in mind that you can hang pot lids and tops this way, just make sure your hooks are big enough for the top to rest, but small enough so the fuller diameter or the top can’t slip through them.
Zero-cost decorating ideas
Paint samples DIY
You know those pretty little tags they have in the paint section of home improvement stores? The ones you look at, imagining just how nice the color would look painted on your walls but think, wow, no way can I make that expense. Well, while it may not be a perfect fix, an alternative wall-coloring option that’s completely free it taking those exact samples and making a collage.
It sounds cheap and boring, but with a little inspiration, you could create anything.
For example, take a look at this Van Gogh Nick Smith made out of paint swatches:
Or maybe this Mona Lisa is more your style:
Not the artistic type? Don’t worry, paint swatch-art is great for abstract concepts. The simplest may be just cutting off the white bits with the paint color’s name and gluing them together.
Or, if you have a little more time, you can cut the samples into small triangles and put them together in a cool pattern like this:
Origami
Everybody’s bound to have some spare paper-like material lying around. Extra newspapers, magazines, and even wrappers just sitting around, waiting to be thrown away could not only be the new detail to spruce up your kitchen walls, but also a new project to enjoy with the family.
You could use this pattern to make some awesome and super cute origami foxes, one to represent each person in your family, and then hang them up! But the fun doesn’t have to end there. You can tell an entire story right on your wall.
If you look at this site, you’ll find hundreds of great ideas for easy origami crafts. Anywhere from mice to cats to penguins, the paper-folding world is yours.
And if you don’t want the fun to end there, use a magnet to put the origami pieces on a whiteboard and make them movable pieces so you have something to occupy the more easily-distracted occupants of your household.
Now take it all in and conquer your kitchen!